ACCURACY MACRO
Smoothness and Precision
With years of professional experience, our team offers you the most precise and smooth macros available at a price that suits your budget. 200
Security
Use Macros Without Risk
Our top priority is your safety. Your protection is at the center of everything we do, and all our mouse macros are designed with security in mind.

Guarantee
100% Performance
Our products are backed by a guarantee of flawless quality and functionality. We believe in the reliability of our macros and offer a full guarantee on their performance.

How to Install Macros on Your Mouse: Logitech, Bloody, x7, Razer
Installation Instructions for your Bloody, x7, Logitech, and Razer mice on WINDOWS
Choose the mouse you need instructions for
How to Install a Macro on the A4Tech X7 Mouse
The installation method is similar for all x7 mice that support the Oscar Editor.
First, move our macros to the root folder of the Oscar Editor program.
Method 1: Navigate to the program’s directory—specifically, the MacroLibrary folder—and move the .amc macro there. You can access this folder via: Program Files (x86) → OscarX7Editor5Mode → ScriptsMacros → Russian → MacroLibrary (please note that the path may vary on your computer). Alternatively, right-click on the program’s shortcut and select “Properties” to locate the file.
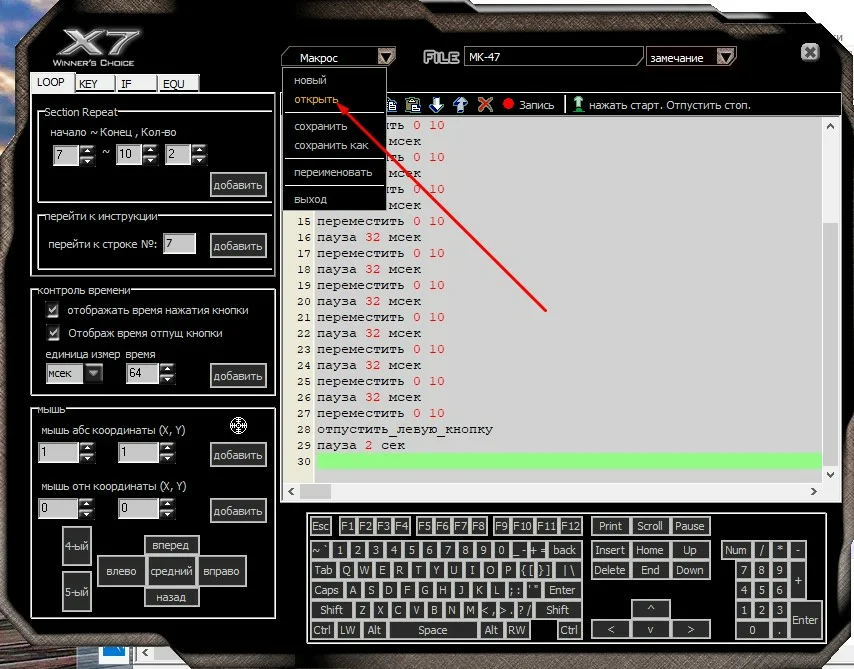
Method 2: Open the “Macro Manager”.
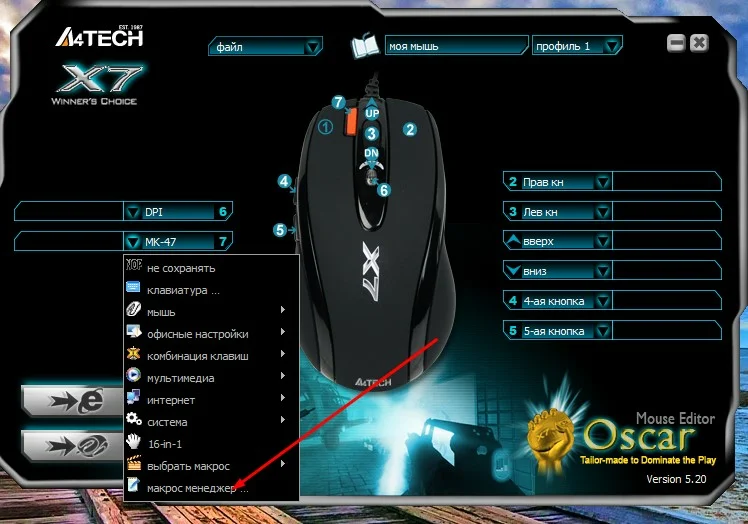
Click “Open” to access the root folder containing the macros. Then, simply drag the required .amc macro into this folder.
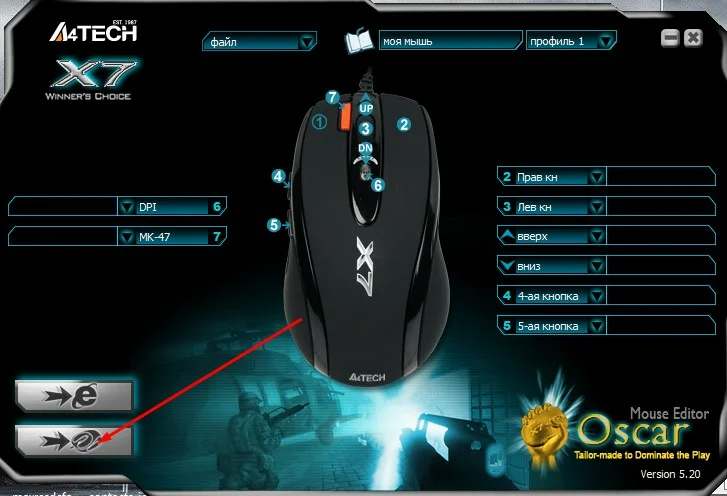
Select and load our macro into the mouse’s memory by clicking the “7” button and then “Select Macro”.
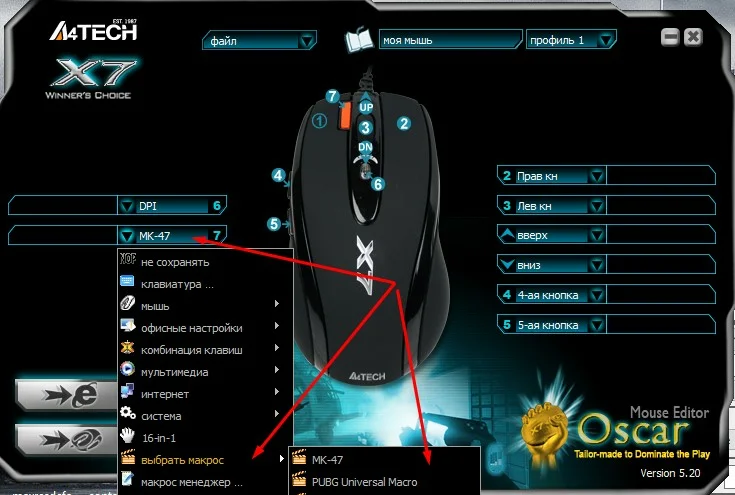
Choose the macro and click the “Load” button.
Congratulations! The macro has been successfully installed into your mouse’s memory. Please note that the MacroLibrary folder should contain only .amc files and no subfolders, otherwise the macro may not load.
How to Install a .amc Macro on a Bloody Mouse
.amc macros are the standard format for mouse macros – they function the same as .mgn files, differing only in file extension.
It is important to note that using macros on a Bloody mouse requires activation of the 3-core feature. Without this activated in the Bloody software, macro installation is impossible. Ensure you complete this step before proceeding.
First, create a folder named after your game within the Bloody software.
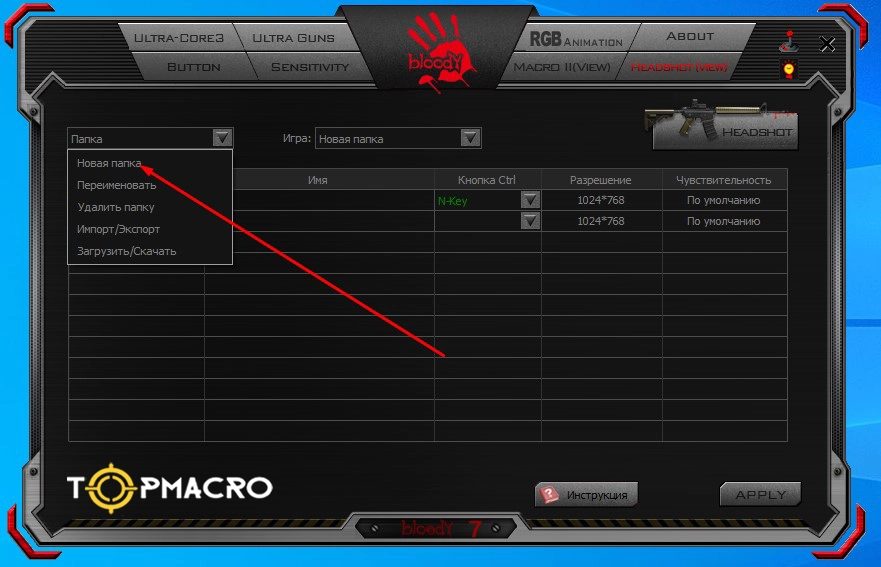
The created folder will appear in the GunLib directory at the following path:
Program Files (x86) → Bloody (3,4,5,6) → Bloody (3,4,5,6) → Data → RES
or
Mouse → English → ScriptsMacros → GunLib
Copy our *.amc macro (without LKM) into the folder you created.
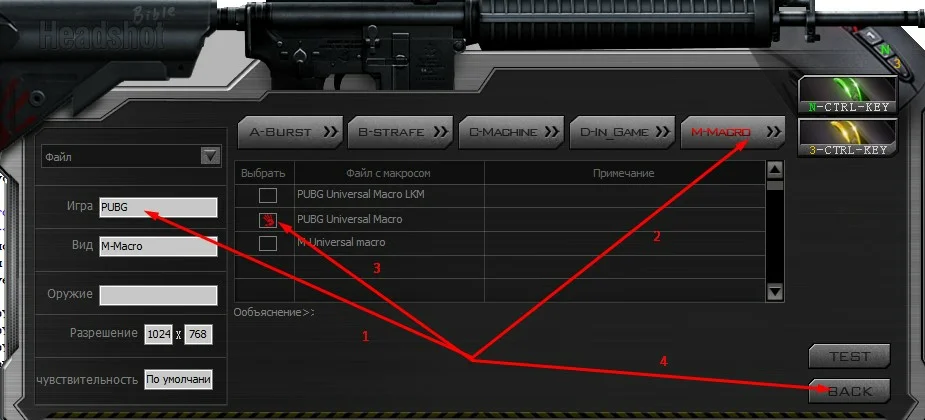
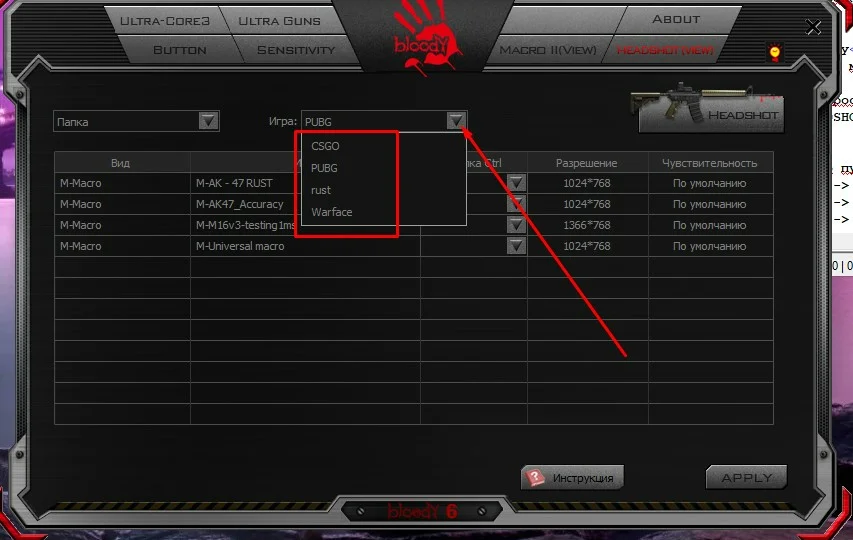
Then open the Bloody program, go to the “HEADSHOT” tab, and select the game (and its name) that you added earlier.

Continue by clicking on “M-MACRO”. Check the box next to your macro and click the “BACK” button. In the confirmation window, click YES.
Enter a name for the macro (for example, “ak47”) and click OK.
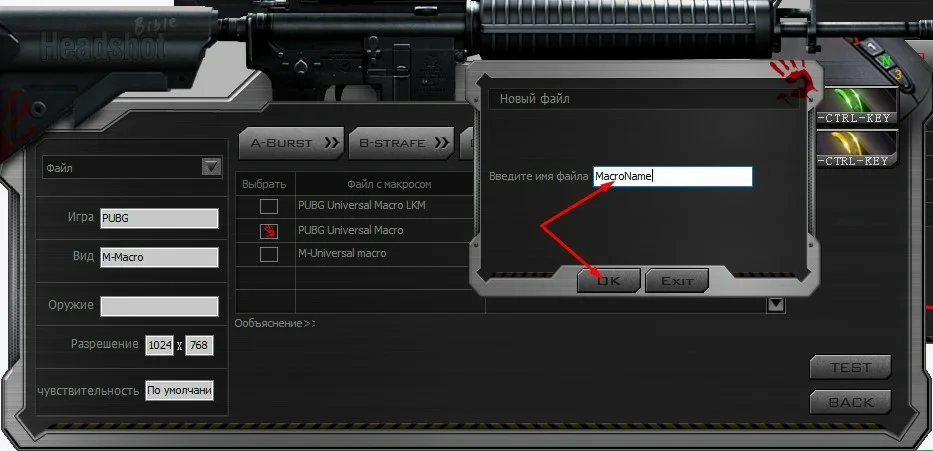
Great! The .amc macro has been successfully loaded into the Bloody software! Now, to transfer the macro into your mouse’s memory, you need to bind it to an n-key or 3-key. This button will control the activation and deactivation of the macro.
How to Install a .mgn Macro on a Bloody Mouse
.mgn macros are converted versions of .amc macros.
As with .amc macros, activating the 3-core feature is mandatory for using macros on a Bloody mouse. Without this activation in the Bloody software, installation will not work. Please ensure you complete this step before proceeding.
Create a folder named after your game in the Headshot section.

Simply move all your .mgn macros into the game directory you created earlier in the Headshot section. Follow this path:
Program Files (x86) → Bloody (3,4,5,6) → Bloody (3,4,5,6) → Data → RES
or
Mouse → English → ScriptsMacros → GunLib
Then go to the “Headshot” section and select the game folder you created. Your macros should now appear in the list.
Choose the button to assign the macro (either an N-key or 3-key) and click “Apply”.
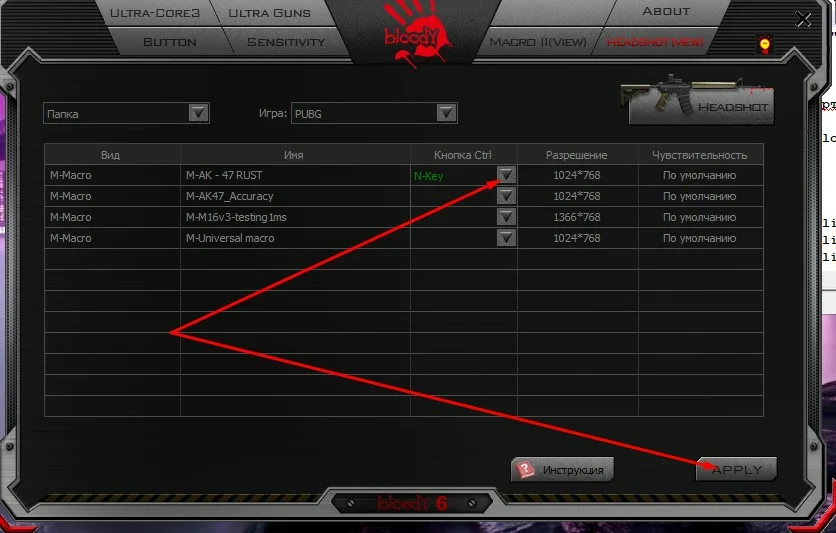
Macros installed successfully!
How to Install a .lua Macro on a Logitech Mouse
Step-by-step guide for installing a script (macro) on Logitech GHUB
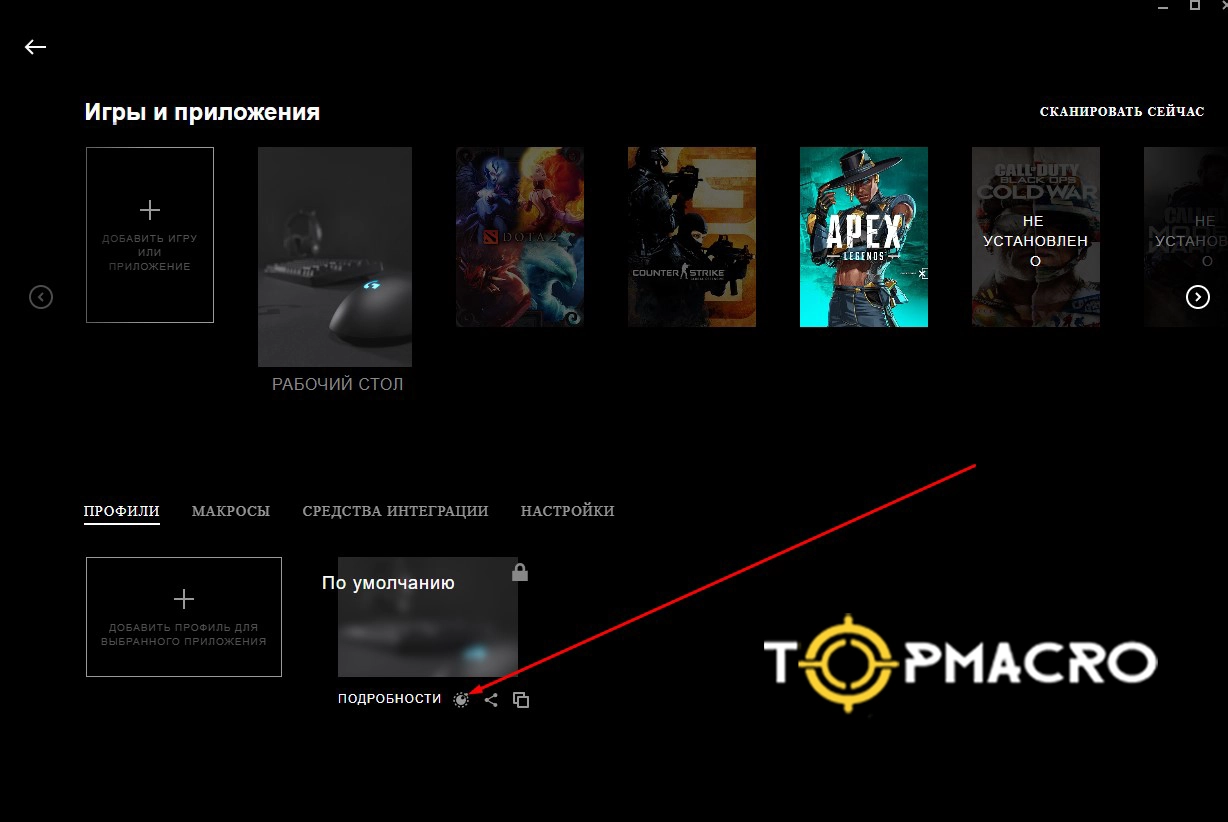
Prepare your .lua macro file – you may move it to your desktop for convenience. Then, navigate to the “Profile Management” page.
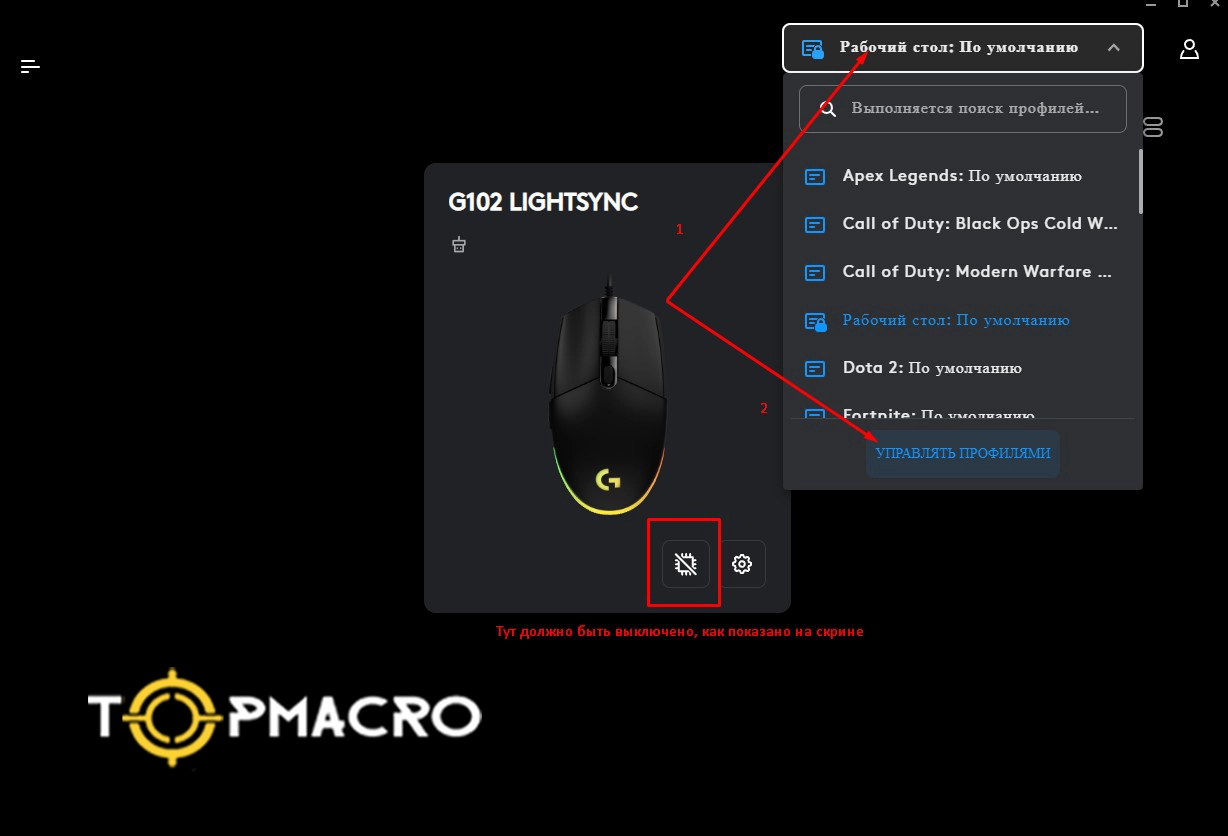
Create a default profile with your desktop set as the primary profile.
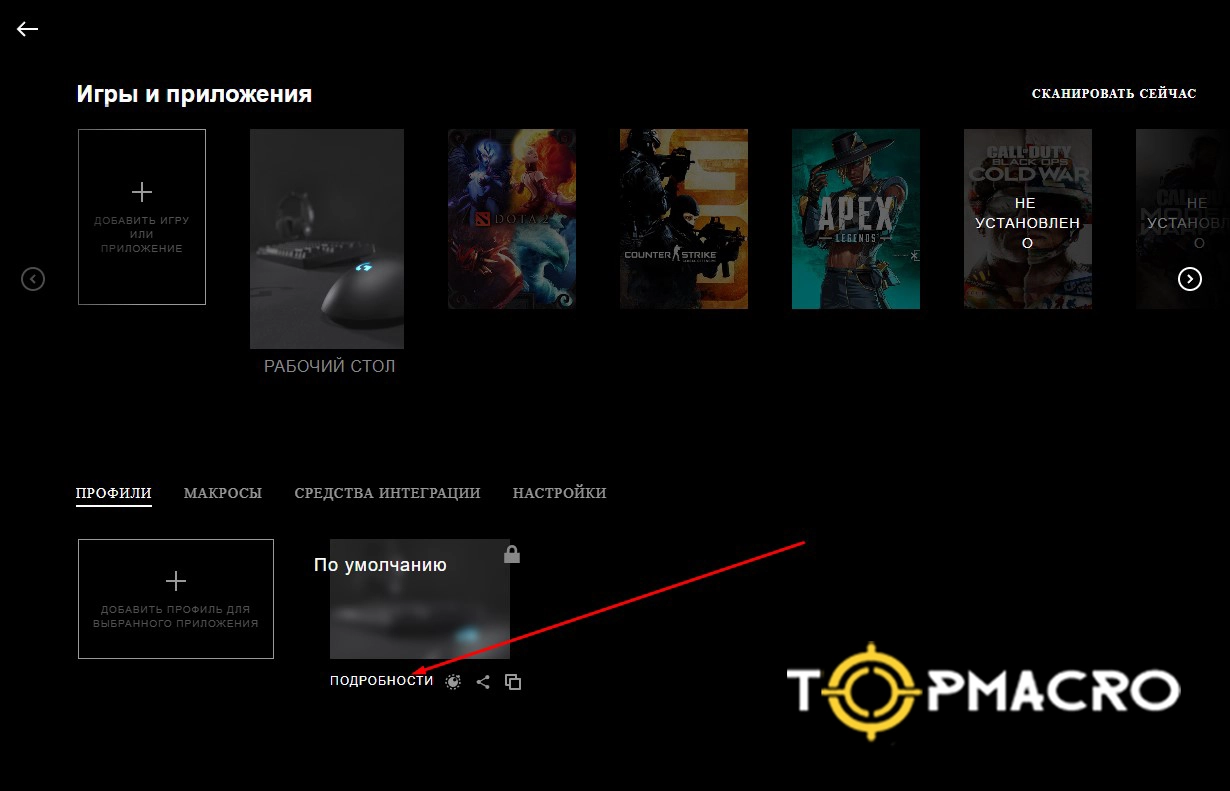
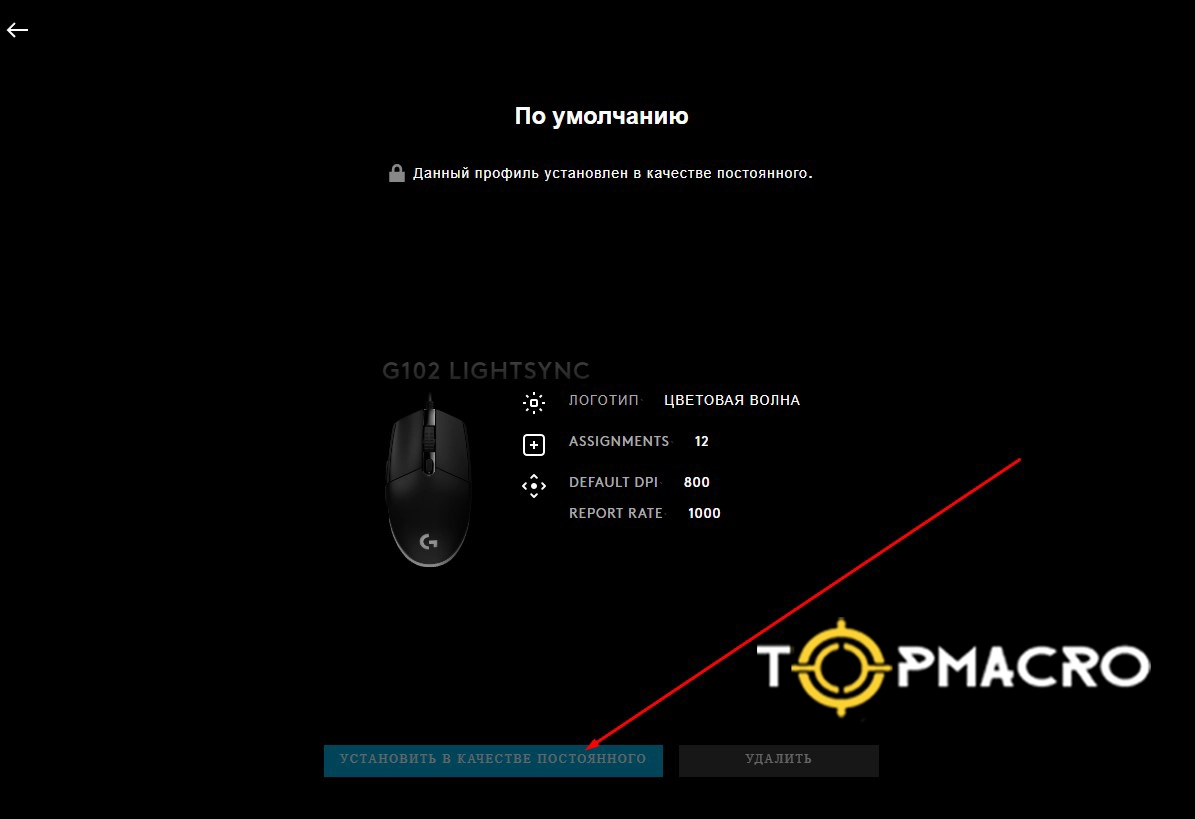
Return to the profile settings and locate the “Script Creation” section within the “Desktop” profile. Note that macros work only in the Desktop profile – using game profiles may be unsafe.
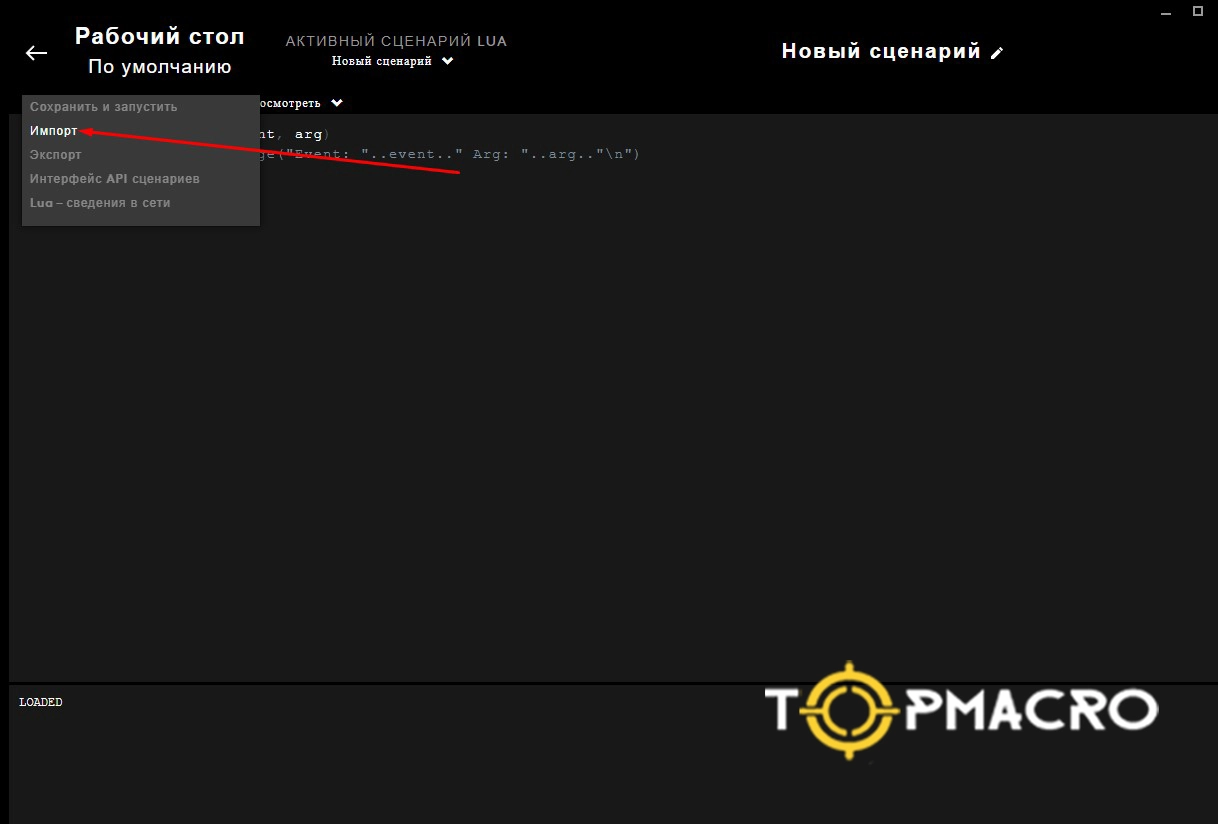
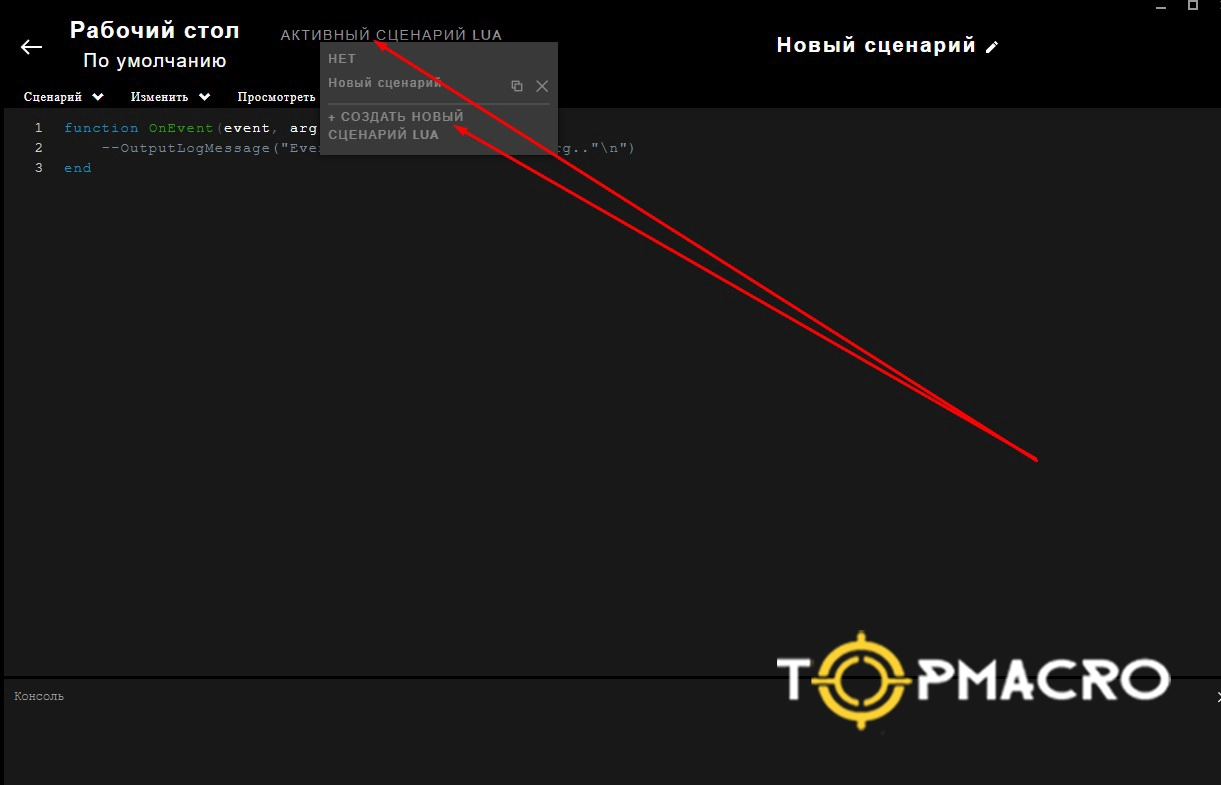
Select “Create New LUA Script”, then navigate to “Script - Import” and choose your .lua file.
After importing, go to “Script - Save and Run”. That’s it – your setup is complete! Now test your new script. Most of our macros are activated by pressing the G5 button (left side). To verify, on the desktop, hold down the left mouse button (or left + right) and observe the cursor movement – a live confirmation that your macro works properly.
If you wish to add a second or third macro for extra functionality, simply click “Create New LUA Script”.
Setup complete – enjoy your game!
How to Install a .xml Macro on a Razer Mouse
Installation for Synapse 3 and Synapse 4
How to Configure Macros in Razer Synapse 3
Step 1: Install the Macro Module
Go to the “Modules” tab and install the “Macro” module (if not already installed). Once installed, open the module and click “Load Macro”. Then, upload the desired .xml macro.
Step 2: Assign the Macro to a Mouse Button
Navigate to the “Mouse” tab. If you wish to assign the macro to the left mouse button (which is disabled by default), first reassign the left-click to another button—such as the mouse wheel. Otherwise, simply assign the macro to a different button.
Step 3: Configure the Macro
Select the desired button and open the “Macro” section. Choose the uploaded macro and be sure to enable the “Play when assigned key is pressed” option. Then click “Save”.
Step 4: Reset Settings
If you need to revert the button to its default settings, select it and click “Default”.
Done! Your macro is now operational.
How to Create and Install a Macro in Razer Synapse 4
Ensure the “Macro” module is installed, and if necessary, install it.
Navigate to the “Macro” module and import the desired macro.
Then, go to the mouse button settings and assign the macro to your chosen button, just as in previous versions.
⚠ Important!
Macros for Synapse 3 and Synapse 4 have different structures and are not interchangeable:
- Macros for Synapse 4 do not work in Synapse 3.
- Macros for Synapse 3 are not compatible with Synapse 4.
Additional Information
Our website, Topmacro.net, offers macros for Logitech, Razer, x7, and Bloody mice.
For Razer products, we provide two types of macros – one for Synapse 3 and another for Synapse 4.